
Interactive quick start
Learn this system in game
The client can walk you through these controls directly inside the live system window. The same steps are listed here for reference.
- 01
Find your client tools
Use the separate feature buttons, or find them in Library if your layout groups them. Quest List tells you what to do next; Cyclopedia tells you where things come from; System Guides explain how systems work.
- 02
Make healing reliable
Press Add, bind your healing rune through Select Object, choose Use on yourself and save. Test the key safely before a boss.
- 03
Bind a card loadout
Choose a free hotkey. Under Extra action choose Set Cards Switch, pick the four cards for that loadout and save. A second key can hold a different set.
- 04
Bind a talent preset
Prepare an unlocked Talent Grid preset, then choose Extra action: Switch to talent preset 1–6. Save the key. A switch has a five-minute cooldown.
- 05
Put frequent actions within reach
Configure action-bar slots for your frequent spells, items and supported build actions. Check each target mode and test it; keep your healing action in a consistent place.
- 06
Choose one quest step
Open Quest List using its button, or select it in Library if you use grouped buttons. Select a mission and read its current instruction, requirements and reward. Return to the named NPC when the step asks you to report back.
- 07
Find the source, not just the item
Search an item or monster in Cyclopedia. Check requirements, attributes and loot sources. Its Guides category includes A–Z Progression when you need a route.
- 08
Replay help whenever needed
System Guides explain each feature in detail. Start or replay a tutorial from its guide page; you do not need to remember everything on the first visit.
- 09
Plan around boss timers
Open Boss Cooldowns. Read the boss state, next appearance and location before travelling. Check your mailbox after contributing to a boss kill.
- 10
Check the whole recipe
Open Crafting, select a recipe and quantity, then read the total materials and Supreme cost. Tool upgrades need the previous rarity, not merely any rod or wrench.
- 11
Choose what you keep
Set desired items and destinations in Auto Loot, then test a normal hunt. Save quest and crafting materials. Boss mailbox rewards do not depend on collecting the corpse manually.
- 12
Leave with one clear goal
Open A–Z Progression. Choose your next quest step, one item source and one build improvement. You now know where to look when you get stuck.
Find the tools
Use the separate feature buttons to open client windows. If your layout groups those buttons, open Library to find the same tools. System Guides explain mechanics; Cyclopedia is the searchable collection of items, monsters, quests and guides. Read A–Z Progression when you need a next goal. Tutorials can be started again from their guide pages.
Hotkeys: healing first
Open Hotkeys with Ctrl+K. Add a free key, Select Object, choose your healing rune and set Use on yourself. Save the binding. Test it somewhere safe. Keep attack, healing and build-switch keys distinct so a panic keypress does not change your build.
Card preset in a hotkey
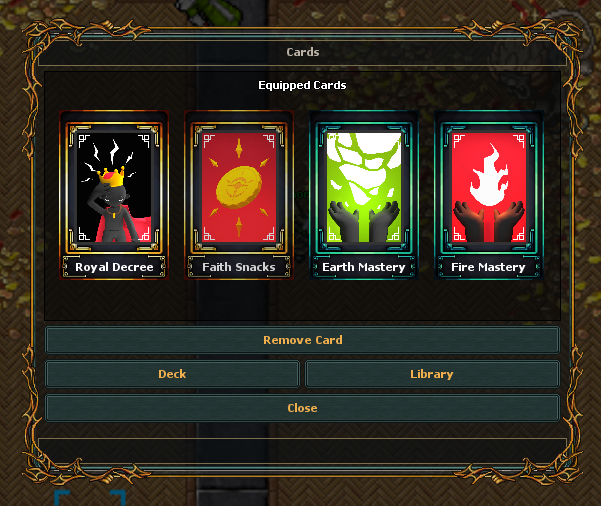
In Hotkeys, select a binding and choose Extra action: Set Cards Switch. The card picker lets you select the four cards for that binding. Save it, then make another binding for your other loadout. The key applies the selected card combination; you still need to own/unlock usable cards and meet the server's switching rules.
 View full size ↗
 The four equipped cards are at the top. Deck and Library are below them. Build and save the card setup before assigning its preset in Hotkeys; this image shows the Cards window, not the hotkey editor.
Talent preset switching
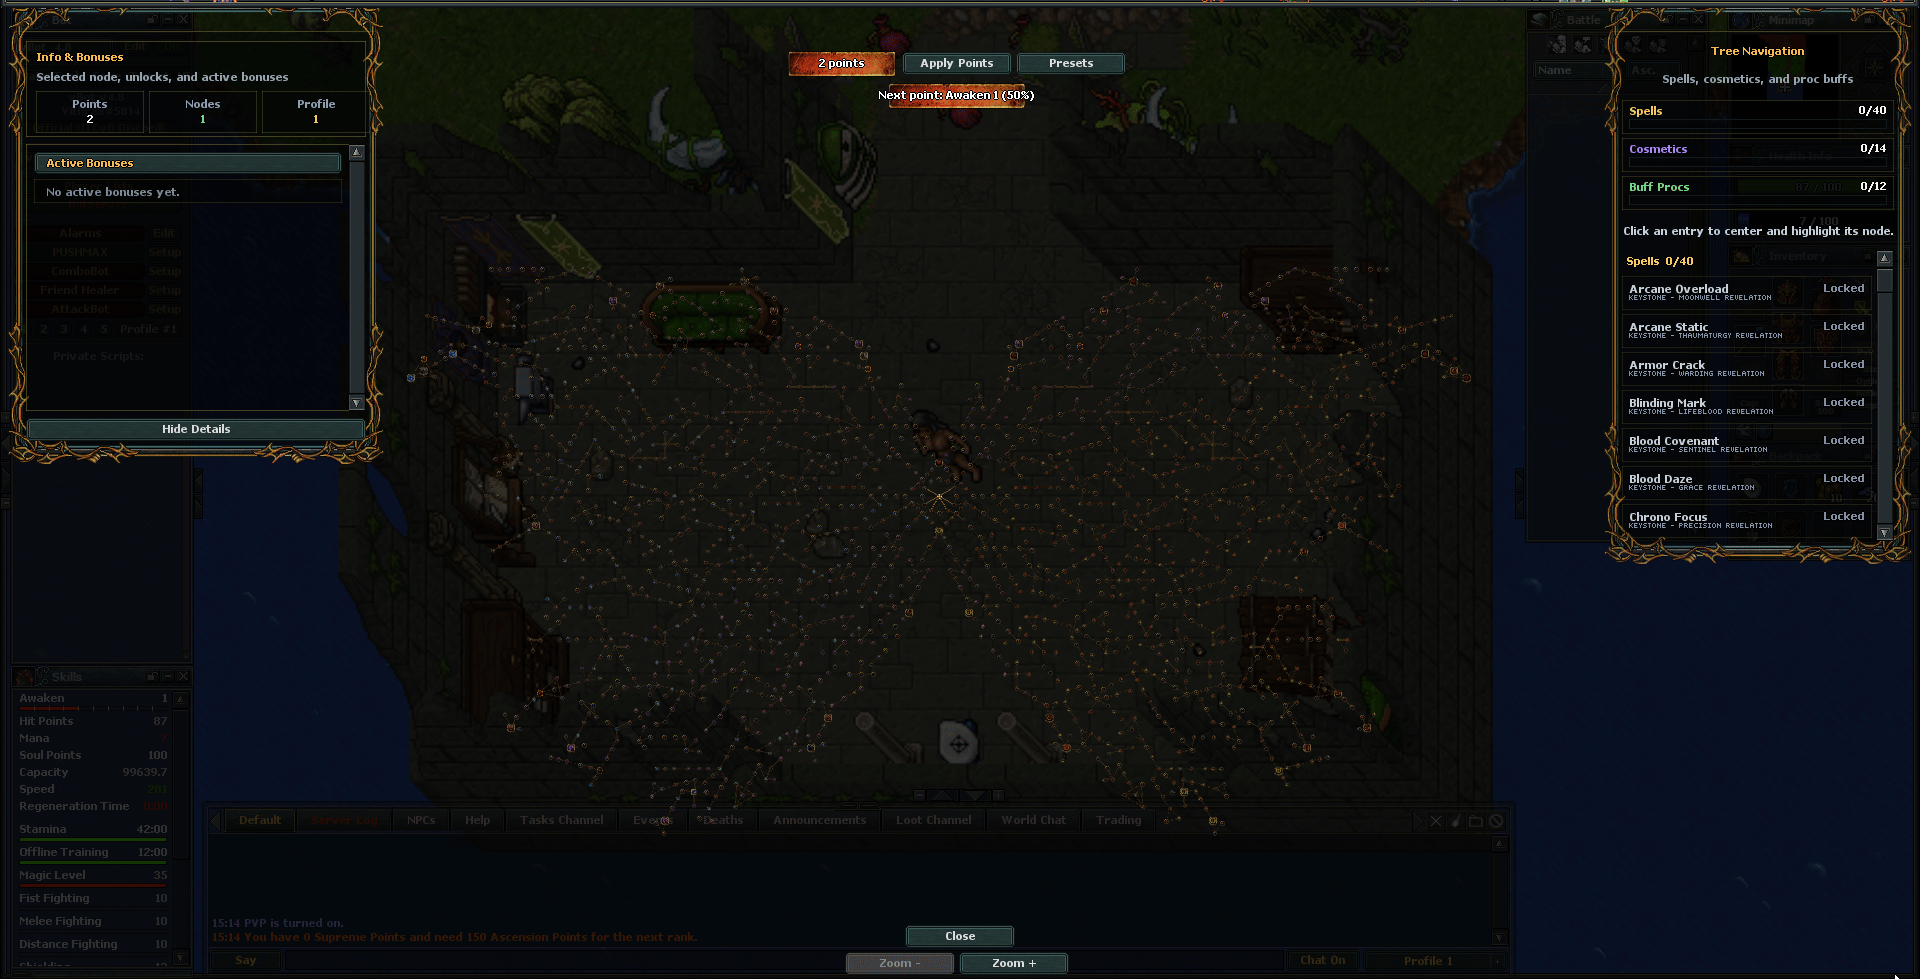
Prepare your builds in Talent Grid first. In Hotkeys, choose Extra action: Switch to talent preset 1–6 for the desired unlocked preset. Save and test the key. Switching has a five-minute cooldown, and a locked preset cannot be activated. Read the resulting message rather than repeatedly pressing the key.
 View full size ↗
 Apply Points and Presets are above the tree. Read the selected node and active bonuses on the left, and use the right-hand navigation to locate spells and effects.
Action bars
Right-click a slot to configure it. Select item sets an item; choose Use on yourself for healing, Use on target for an offensive target, or With crosshair for manual aiming. Talent Preset and Set Cards Switch open build pickers. Set text creates a text action, Set hotkey assigns its key, and Clear removes the slot action. Keep healing in a consistent location and test each new slot before a boss room.
Play the capture to see the interface controls and layout. Keep healing and frequently used actions within easy reach while leaving the play area readable.
Quest List
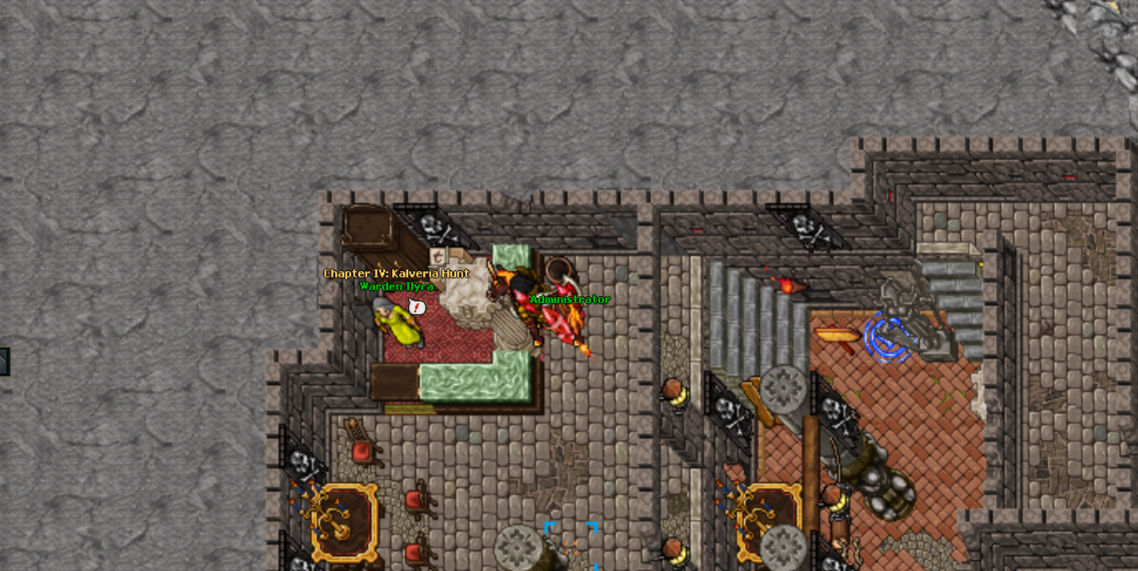
Choose a quest and then its current mission. Read the latest state text, material quantities, kill counters, NPC instructions and reward. Some steps finish through an NPC, item, tile or phrase rather than automatically after a kill. Completed rewards are not reset by repeating an accessible room to help friends.
 View full size ↗
 For example, Warden Ilyra is labelled Chapter IV: Kalveria Hunt. Use the chapter and NPC named in your Quest List to identify the correct objective.
Cyclopedia and System Guides
Search the exact monster or item name in Cyclopedia to find requirements, attributes and sources. Use its Guides category for the A–Z route and system instructions. System Guides provide longer explanations and Start tutorial/Replay controls. A generic guide never overrides a live quest requirement or recipe shown in the client.
Play the navigation example, then look up your own target. Item and monster entries answer different questions: what the item does, and where its source can be found.
Boss Cooldowns
Find the boss in the list and read its state, countdown and location. A cooldown ending is not a personal reservation or guaranteed uncontested kill. Daily Ascended encounters use server time. Watch announcements for the additional World Objective trio.
 View full size ↗
 The filters are at the top. Each entry shows its boss, category and current status; use its information button for details. The displayed Alive statuses belong to this example capture.
Crafting
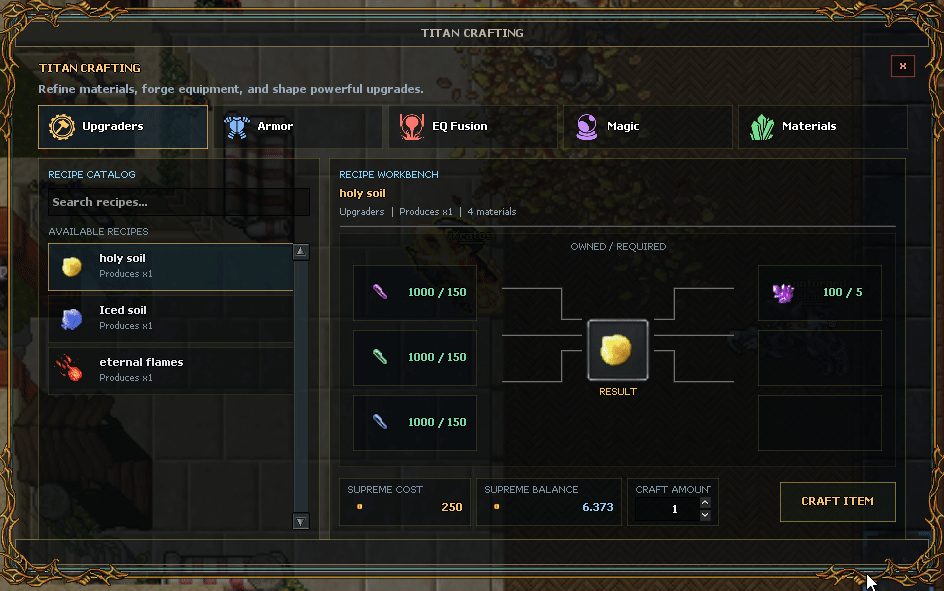
Select the profession, recipe and quantity. Inspect every required material and the total Supreme cost before crafting. Gathering upgrades require the exact previous-rarity tool, preserve its item ID and upgrade it in place. Mirrored equipment cannot pay crafting ingredients.
 View full size ↗
 Choose a category and recipe on the left. The workbench shows owned / required ingredients around the result; Supreme cost and craft quantity are below. This capture demonstrates the holy-soil recipe.
Auto Loot
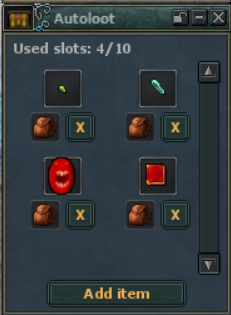
Choose the items you want collected and their destination in Auto Loot. Keep currency and crafting-material choices deliberate and test on a normal hunt. Boss contributor rewards use mailbox delivery, so an empty boss corpse does not mean your reward disappeared. Check your depot inbox.
 View full size ↗
 Used slots appears at the top, Add item at the bottom, and each configured item has a remove button. Review the actual item icons before starting a long hunt.
A working setup
Before a hunt: healing key works, attack key works, correct cards active, correct talents active, useful loot selected and one quest tracked. After the hunt: check your inbox, bank and recipe requirements, then decide what to keep before selling or defusing.
Continue learning
A–Z Progression: What Should I Do Next?
A practical route from Beginner Island to Ascended equipment, with a next action at every stage.
Ability Cards
Collectible build cards with rarity, four equipped slots, token unlocking, ten upgrade stages, and scaling bonuses.
Talent Grid
A large directional passive tree for attributes, procs, learned spells, buffs, and cosmetic milestones.
Crafting Professions
Dedicated professions for weapons, armor, jewelry, enchantments, and consumables, powered by materials and Supreme Points.
Boss Cooldowns
A lightweight live view of global availability, tiered War Zone raids, personal mini-boss access, underground rotations, and boss information links.
Tooltips, Cyclopedia, and Context Navigation
Titan's connected information layer for authoritative tooltips, exact compendium navigation, reverse loot lookup, filters, and reward previews.